How to Take the Right Selfie for a Hair Try-On
Oleh Onysko 15 August 2026 7 min read

In this article
When a virtual hair try-on gives a strange result, the photo is usually the culprit, not the software. The tool reads your face shape, hairline and colouring from the selfie you hand it; hand it a dim, tilted, filtered photo and it will faithfully restyle a face that is not quite yours. Ten seconds of setup fixes nearly all of it. Here is the checklist.
Light: face a window
Soft, even, frontal light is the single biggest upgrade. Stand facing a window in daytime and you are done; that is the whole technique. Diffuse daylight shows your real skin tone and your real hair colour, which matters doubly if you are testing colour, since the before and after are only comparable when the before is accurate.
What to avoid: overhead bathroom light, which shadows the eye sockets and jaw and genuinely changes the face shape the software measures. Backlight from a window behind you, which turns you into a silhouette. And harsh direct flash, which flattens features and bleaches colour. If the photo looks moody, atmospheric or flattering in a way daylight is not, it is the wrong photo.
Time of day matters less than direction. Midday, morning, overcast: all fine, provided the window is in front of you rather than above or behind. If you can see both of your ears and the true colour of your own eyebrows in the preview, the light is doing its job.
Angle: eye level, straight on
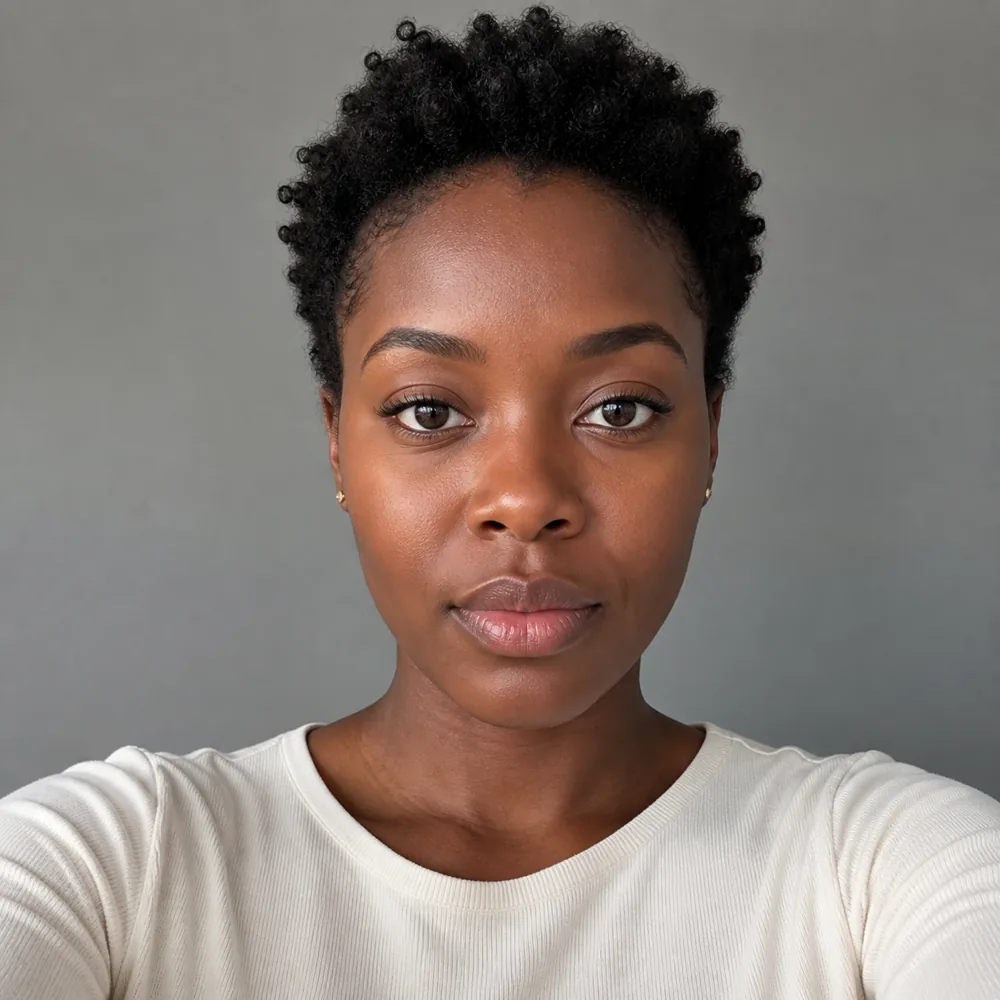
Hold the camera at eye height, at arm's length or propped, and look straight into it with your chin level. This is not aesthetic fussiness; it is geometry. A camera held low widens the jaw and shortens the forehead. A camera held high does the reverse. Since the try-on matches styles to the face shape it measures, a tilted photo gets styles matched to a face you do not have.
Keep your head upright too, not tilted to the side, and keep your expression close to neutral. A broad grin lifts the cheeks and changes the apparent face shape; the small pleasant default you would use in a passport queue is about right.
Hair: show what is actually there
Push your hair off your face so the hairline, forehead and both ears are visible. The tool needs to see where your hair actually starts and where your face actually ends; a fringe over the eyebrows or hair hugging the cheeks gets read as face boundary and skews the mapping. No hats, no headbands pushed low, no hood.
Leave your hair otherwise as it normally is. If you are testing colour with a virtual hair colour try-on, make sure your current colour is clearly visible and accurately lit, because the honest before is what makes the after meaningful. Judging a blonde render against a photo where your hair was already washed out by flash tells you nothing.


Frame and background
Head and shoulders filling most of the frame, in focus, from a rear or front camera at normal zoom. The background needs no styling; it just should not compete. A plain wall beats a busy room, and nothing patterned directly behind your head, where the new hair will be drawn.
Simple disqualifiers: group photos, sunglasses, anything cropped from a wide shot until it is a blur of pixels. The tool works from one selfie, but it has to be one selfie of you, sharp, alone and facing forward.
The mistakes that ruin otherwise good photos
Beauty filters and smoothing
Filtered photos have altered geometry, slimmer jaw, bigger eyes, so the try-on restyles the filtered face. Use an unedited photo, however unglamorous that feels.
Old photos
A selfie from three years and one hairline ago produces a result from three years ago.
Golden-hour and mood lighting
Lovely on Instagram, useless as a colour reference.
Wet or scraped-back-tight hair
when you want your texture considered; the tool reads texture from what it can see.
| Mistake | What the tool sees | Fix |
|---|---|---|
| Overhead bathroom light | Shadowed sockets and jaw, so a different face shape | Face a window in daytime |
| Backlight from a window behind you | A silhouette with no readable features | Turn around |
| Beauty filter or smoothing | A slimmer jaw and bigger eyes that are not yours | Use an unedited photo |
| Camera held low or high | A widened jaw or a shortened forehead | Camera at eye level |
| Fringe over the eyebrows | Hair read as the face boundary | Pin it back for the photo |
| A three-year-old selfie | A three-year-old hairline | Take a new one |
The thirty-second checklist
Before you upload, run down the list:
- Facing a window, daytime, no flash.
- Camera at eye level, head straight, expression neutral.
- Hair off the face, hairline and both ears visible.
- Head and shoulders in frame, sharp focus, plain background.
- No filters, no old photos, no sunglasses.
Every item costs seconds, and each one removes a specific failure mode. If the photo passes all five, the renders that come back are about as honest as the technology can make them. Which is the point of the exercise: you are not collecting flattering pictures, you are making a decision.
Then let it run
With a decent photo, the rest is quick. Your photo is sent only when you ask for a render, each look takes about twenty seconds, and the styles come matched to your face shape and hair texture rather than pasted on top. Start with an AI hairstyle changer session, save the contenders to your looks, and compare them side by side.
One good selfie is reusable across every cut and colour you are curious about, which makes those ten seconds of setup the best-leveraged effort in the whole process. The first look is free, no card required.
The photo, step by step
How to take a selfie for an AI hair try-on
- Stand facing a window in daylight
Soft frontal light is the single biggest upgrade. No overhead light, no backlight, no flash.
- Put the camera at eye level and keep your chin down
Prop it or hold it at arm's length. A camera held low widens the jaw; held high it does the reverse, and the tool matches styles to whatever it measures.
- Push all your hair off your face
Hairline, forehead and both ears visible. No hats, no hoods, no headband pushed low.
- Keep your expression close to neutral
A broad grin lifts the cheeks and changes the apparent face shape. Aim for the face you would use in a passport queue.
- Fill the frame with head and shoulders, on a plain wall
Sharp focus, nothing patterned directly behind your head where the new hair will be drawn.
- Check it is unedited before you upload
No filters, no smoothing, and not a crop from a group photo. One good selfie is reusable across every cut and colour you are curious about.
Frequently asked questions
Face a window in daytime, camera at eye level, head straight and expression close to neutral, hair pushed off your face so the hairline and both ears are visible, head and shoulders filling most of the frame, sharp focus, plain background, no filters.
Usually the photo rather than the software. The tool reads your face shape, hairline and colouring from the selfie you hand it, so a dim, tilted or filtered photo gets styles matched to a face that is not quite yours.
It is the single biggest upgrade. Overhead bathroom light shadows the eye sockets and jaw and genuinely changes the face shape the software measures, backlight from a window behind you turns you into a silhouette, and harsh flash flattens features and bleaches colour. If the photo looks moody or flattering in a way daylight is not, it is the wrong photo.
Neither. Beauty filters alter the geometry, slimming the jaw and enlarging the eyes, so the try-on restyles the filtered face. And a selfie from three years and one hairline ago produces a result from three years ago.
No. One good selfie is reusable across every cut and colour you are curious about, which makes those ten seconds of setup the best-leveraged effort in the whole process.
Share article
About the author
Founder & Editor
Founded Hairstyle Atlas after one bad clipper decision too many. Writes and edits the guides here, and tests every haircut on his own photo before recommending it.
More articles
AI Hair Tools · 6 min
The Best AI Hairstyle Apps in 2026, Tested on One Face
Five AI hairstyle tools run on the same selfie, judged on whether the result is still your face. What each is actually for, and where each one breaks.
AI Hair Tools · 5 min
Free AI Haircut Filters: What You Actually Get Without Paying
What the free tier of an AI haircut tool really includes, the four ways free gets limited, and how to get a usable answer without a subscription.
AI Hair Tools · 6 min
ChatGPT Hairstyle Prompts That Actually Help
Copy-paste prompts for haircut advice, plus the one thing to ask before anything else. What a chatbot is genuinely good at, and where it starts inventing.