Hairline & Thinning Preview
Before you spend four figures on a transplant, or a year on a treatment, see what the result would actually look like on your face - and what the alternatives look like next to it.






Preview a new look
Your first look is free.
Free sample previews. Try every look on our sample faces here without registering. Your own photo needs a free account, no card: 15 credits once (a cut costs 10, a color on it 5). That covers one cut plus one color on it. No refill; further renders are paid. The optional Plus trial can be declined.



- 48,000+
- users worldwide
- 165,000+
- hairstyles tried
Try it yourself
Pick a look, drag the handle to compare. Then do it with your own selfie.


Keeping a textured fade
- Back in the chair every 3 to 4 weeks.
- Spritz salt spray through damp hair.
- Wash 3 to 4 times a week.

Keeping a edgar
- Back in the chair every 2 to 3 weeks.
- Dry the bangs forward while it is still damp.
- Wash 3 to 4 times a week.

Keeping a modern mullet
- Back in the chair every 6 to 8 weeks.
- Salt spray through the whole head while damp.
- Wash 2 to 3 times a week.

Keeping a perm
- Back in the chair every 8 to 10 weeks.
- Work curl cream through soaking-wet hair.
- Wash 2 to 3 times a week.


Keeping a curtains
- Back in the chair every 6 to 8 weeks.
- Spray salt spray through wet hair.
- Wash 3 to 4 times a week.

Keeping a crew cut
- Back in the chair every 4 to 5 weeks.
- Rub a small amount of clay through dry hair.
- Wash 3 to 4 times a week.

Keeping a ivy league
- Back in the chair every 4 to 5 weeks.
- Part it damp, on the side it already falls.
- Wash 3 to 4 times a week.

Keeping a disconnected crop
- Back in the chair every 3 to 4 weeks.
- Salt spray, then dry the top forward.
- Wash 3 to 4 times a week.

Keeping a low taper blowout
- Back in the chair every 2 to 3 weeks.
- Salt spray at the roots while wet.
- Wash 3 to 4 times a week.

Keeping a taper fade
- Back in the chair every 3 to 4 weeks.
- Towel-dry until damp, not dripping.
- Wash 3 to 4 times a week.

Keeping a quiff
- Back in the chair every 4 to 5 weeks.
- Blow-dry the front up and back over a round brush.
- Wash 3 to 4 times a week.

Keeping a restored
- Back in the chair every 4 to 5 weeks.
- Dry the front forward rather than back.
- Wash 3 to 4 times a week.

Keeping a shaved
- Back in the chair every 1 to 2 weeks.
- Shave with the grain, not against it.
- Wash 5 to 7 times a week.

Keeping a platinum
- Back in the chair every 4 to 6 weeks.
- Purple shampoo once a week, no more.
- Wash 1 to 2 times a week.

Keeping a jet black
- Back in the chair every 6 to 8 weeks.
- Color-safe shampoo, cold rinse.
- Wash 2 to 3 times a week.

Keeping a ash brown
- Back in the chair every 6 to 8 weeks.
- Color-safe shampoo, cool rinse.
- Wash 2 to 3 times a week.

Keeping a silver
- Back in the chair every 8 to 10 weeks.
- Purple shampoo weekly to stop it yellowing.
- Wash 2 to 3 times a week.

Keeping a low taper
- Back in the chair every 3 to 4 weeks.
- Towel-dry until damp.
- Wash 3 to 4 times a week.

Keeping a italian cut
- Back in the chair every 6 to 8 weeks.
- Salt spray on damp hair.
- Wash 2 to 3 times a week.

Keeping a comma fringe
- Back in the chair every 4 to 5 weeks.
- Blow-dry the top forward and full from damp.
- Wash 3 to 4 times a week.

Keeping a mop cut
- Back in the chair every 8 to 10 weeks.
- Salt spray through damp hair.
- Wash 2 to 3 times a week.
Every after is this tool's own render of a demo face, pre-generated for speed - nothing on this page renders live.
Preview a new look
Your first look is free.
Three steps
How it works
Before you spend four figures on a transplant, or a year on a treatment, see what the result would actually look like on your face - and what the alternatives look like next to it.
- 01 Your selfie
Reveal the existing front
Move loose hair off the forehead and photograph the temple corners at eye level. Avoid a shadow that hides the boundary you want to compare.
- 02120+ looks
Compare fuller and exposed outlines
Study a proposed fuller front beside a crop or a closer style. Separate the shape you prefer from any expectation about changing your actual growth.
- 03 Your result
Label the reference clearly
Bring the hairline mock-up to a barber or consultation as an appearance reference. It is not an assessment, treatment plan or predicted outcome.
A preview is a reference image, not a medical or surgical prediction. Talk to a qualified clinician before starting any treatment.
A fuller front is a shape comparison, not a forecast
The hairline filter lets you compare how a different front boundary frames your forehead. That boundary has several parts: the central height, the corners near the temples and the transition into the sides. Lowering the center while filling both corners produces a different outline from leaving a mature center and softening only the recesses. Look at each part rather than judging the picture as simply more hair.
A perfectly straight front can look unfamiliar even when the additional coverage initially appeals. Natural-looking boundaries often have variation rather than a ruler-straight edge. Your existing photograph can help show the proportions of your brow and forehead, but it cannot establish where new hair could grow or how dense it could become. The rendered edge is an invented visual proposal.
Use that proposal to clarify a preference, not to estimate a treatment result. A clinician would need information that the tool never gathers, and the preview does not assess any procedure or medication. If you bring it to a consultation, label it as a generated image and describe the specific feature you like, such as softer temple corners. That keeps an appearance question separate from the professional assessment of what, if anything, is feasible for your scalp.
Compare framing your current hairline with redrawing it
A higher front does not leave you with only one haircut option. A forward crop can create an edge with fringe, a shorter top can reduce the contrast between thick and sparse-looking areas, and a swept style can leave the corners deliberately visible. Those are styling choices around the hairline you have. Filling the front in a render is a different visual experiment.
Put those two questions beside each other. First ask whether you like the shape of a proposed fuller boundary. Then ask whether you prefer a haircut that works with the current boundary instead. Keeping the distinction clear prevents a neat crop from being mistaken for a prediction of increased density. It also makes the discussion with your barber more specific.
Look closely at the corners in each result. A fringe can cover them in the still without staying there during movement, wind or a normal wash day. If your hair separates at the front, mention that before choosing a crop that depends on uninterrupted coverage. Conversely, a short exposed front may feel more intentional than a longer style you keep pulling into place. The filter gives you a way to compare those appearances without deciding that concealment or a lower line must be the goal.
Photographing a hairline so the comparison has a useful starting point
The front boundary must be visible if you want a meaningful hairline comparison. Brush loose pieces away from the forehead without pulling the hair unnaturally tight. Keep the camera roughly level with your face so the brow and temple corners are not distorted by looking sharply down or up. A dark shadow across the roots can make an existing corner disappear before the tool even starts.
Take particular care with the space between your eyebrows and the central hairline. A steep camera angle can compress that distance, making a lowered front look modest when it would feel much stronger in person. Use the original photo beside the result to check that you are evaluating the boundary rather than a change in perspective or lighting.
The preview should not become a way to track hair loss. Different lighting, styling and generated details can create apparent changes that have no useful clinical meaning. If your concern is a change in growth, discuss that concern directly with a qualified clinician instead of comparing synthetic versions. For the barber conversation, keep the original visible and point out the crop, exposure or fringe direction you want to explore. A clear starting photograph helps that conversation while leaving questions about your scalp outside the filter's remit.
Your hairline, previewed four ways
Fuller hairline
The front and temples drawn back in at a natural height and density, so you can see the shape you would be asking for on your own brow.
Shorter crop
A French crop or textured crop keeps weight forward and stops the eye at the bangs rather than the temples. No clinic involved, just your barber.
Grade two buzz
One length everywhere. It flattens the contrast between thinner and thicker areas instead of drawing a line across your forehead for people to follow.
Clean shave
The floor of your options, previewed early. If you are comfortable with this version, every choice stacked above it gets much easier to make calmly.
Questions about the Hairline & Thinning Preview
Straight answers, no hedging.
No. It draws an appearance without assessing your scalp or the information needed for a clinical plan. A fuller temple in the result does not indicate that a procedure could create that coverage.
Those are distinct visual preferences. Use the image to point out which part of the front you like, rather than describing the whole result as a restored hairline. Feasibility remains a separate professional question.
Hair lying across a corner can make the starting boundary unreadable. Moving it aside helps you compare the proposed outline with what is actually visible in the original, instead of with a fringe covering the same area.
No. A crop changes how hair falls around the existing front. A fuller-line mock-up invents a different boundary. Keep those comparisons separate when discussing a haircut so coverage by fringe is not confused with additional growth.
Generated details and differences between photographs make them unsuitable for tracking growth. Use the filter for appearance choices. Bring concerns about changing hair to a clinician who can assess them directly.
Say that it is a generated shape you wanted to consider. Point out the center height or temple curve that interests you, and ask the clinician to evaluate the question independently of the simulated density.
Other tools to explore

Link to this tool
Free sample previews, free to link or embed. No permission needed.
https://hairstyleatlas.com/hairline-filterExplore more try-on tools
Same selfie, a different change. Every tool below runs on the photo you already uploaded.
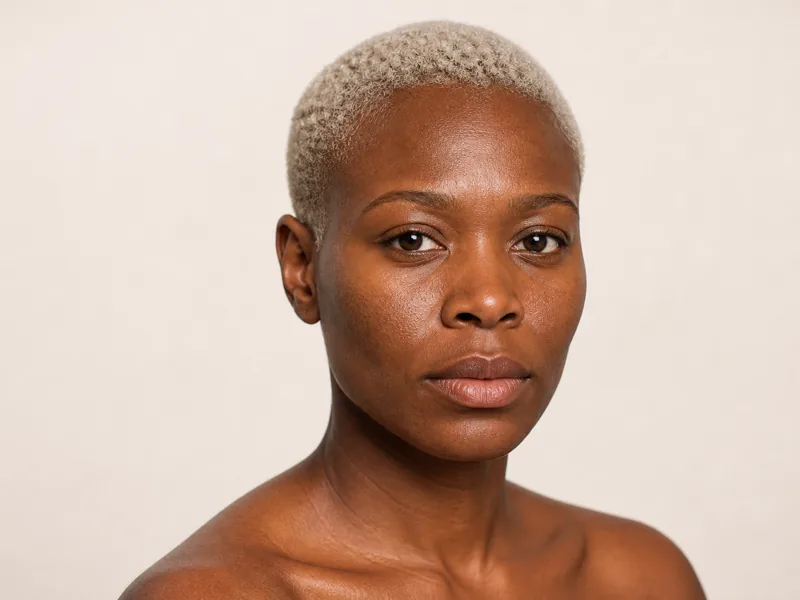



Look at the front boundary.
Keep the expectation clear.
Compare a fuller outline with cuts around your current hairline, using the preview only as a visual reference.